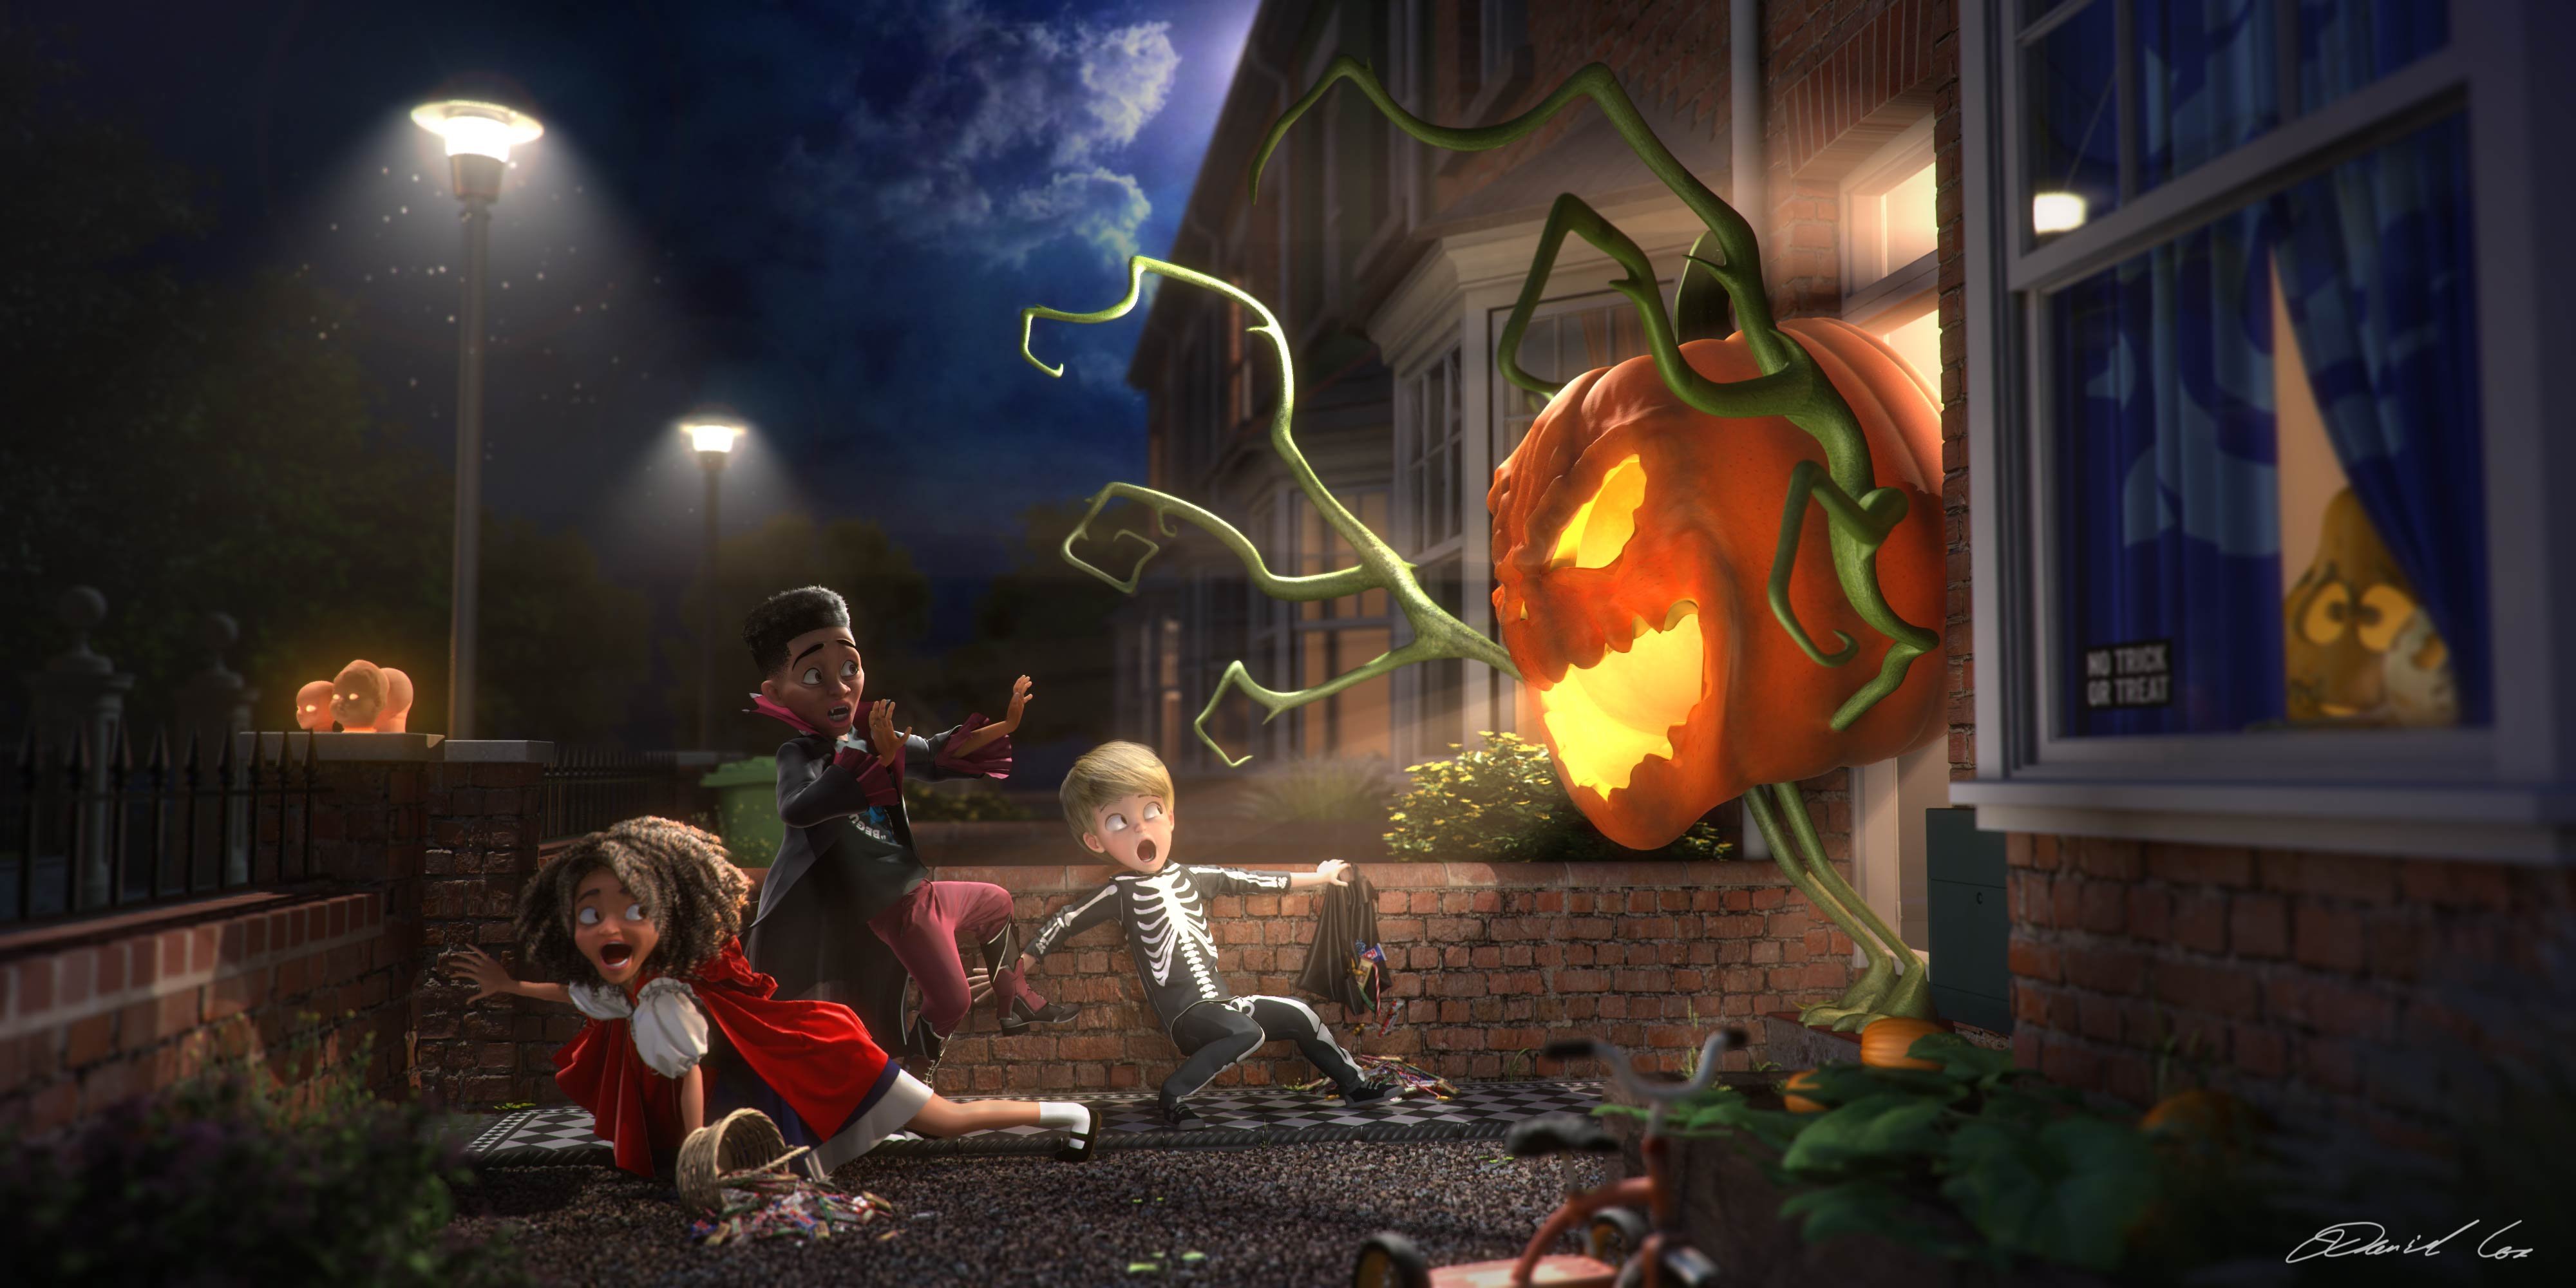
Cartoon king - Dan Cox
Dynamo produces animation for award-winning cartoons in the UK
LightWave Digital: Hi, Dan. Introduce yourself to the readers
Dan Cox: I'm head of 3D and animation at Dynamo Ltd based in Exeter. I've been in this role for about 5-6 years. Before that, I ran a 3D animation studio called 3D Solutions from about 2002 onwards. At Dynamo, we focus mainly on children's entertainment, be that 3D animation, brands and licensing, publishing, illustration or toys and games. In the 3D department, we quite often take on the additional work needed to supplement TV series, such as PJ Masks, Trollhunters, Bing Bunny, Ricky Zoom, Kia, Barney, Octonauts, The Deep, Peppa Pig and My Little Pony. Back at 3D Solutions, I was one of three animators who worked on the Numberjacks TV series (which also won a Royal Television Society award two years in a row for best children's entertainment). Our list of books is too great to list, but one of our in-house illustrators has single-handedly done all the illustrations for the Beast Quest series which has kept him busy since about 2007. However, it's also really useful to have such good artists on tap to concept sketch for 3D character development. Some of them also use their skills to hand paint the textures over the UV maps if the look requires it (the Dino Roar series of books, for example), or to provide matte paintings and storyboards for the animations.
Our website is in that cliche of being under construction at the moment but you can still access an overview of what we do here: http://www.dynamolimited.com
Our showreel is due to be updated soon too, but here's where it was at last year.
LD: The setup and posing for this image seem mammoth. Did you model and texture everything just for this contest?!
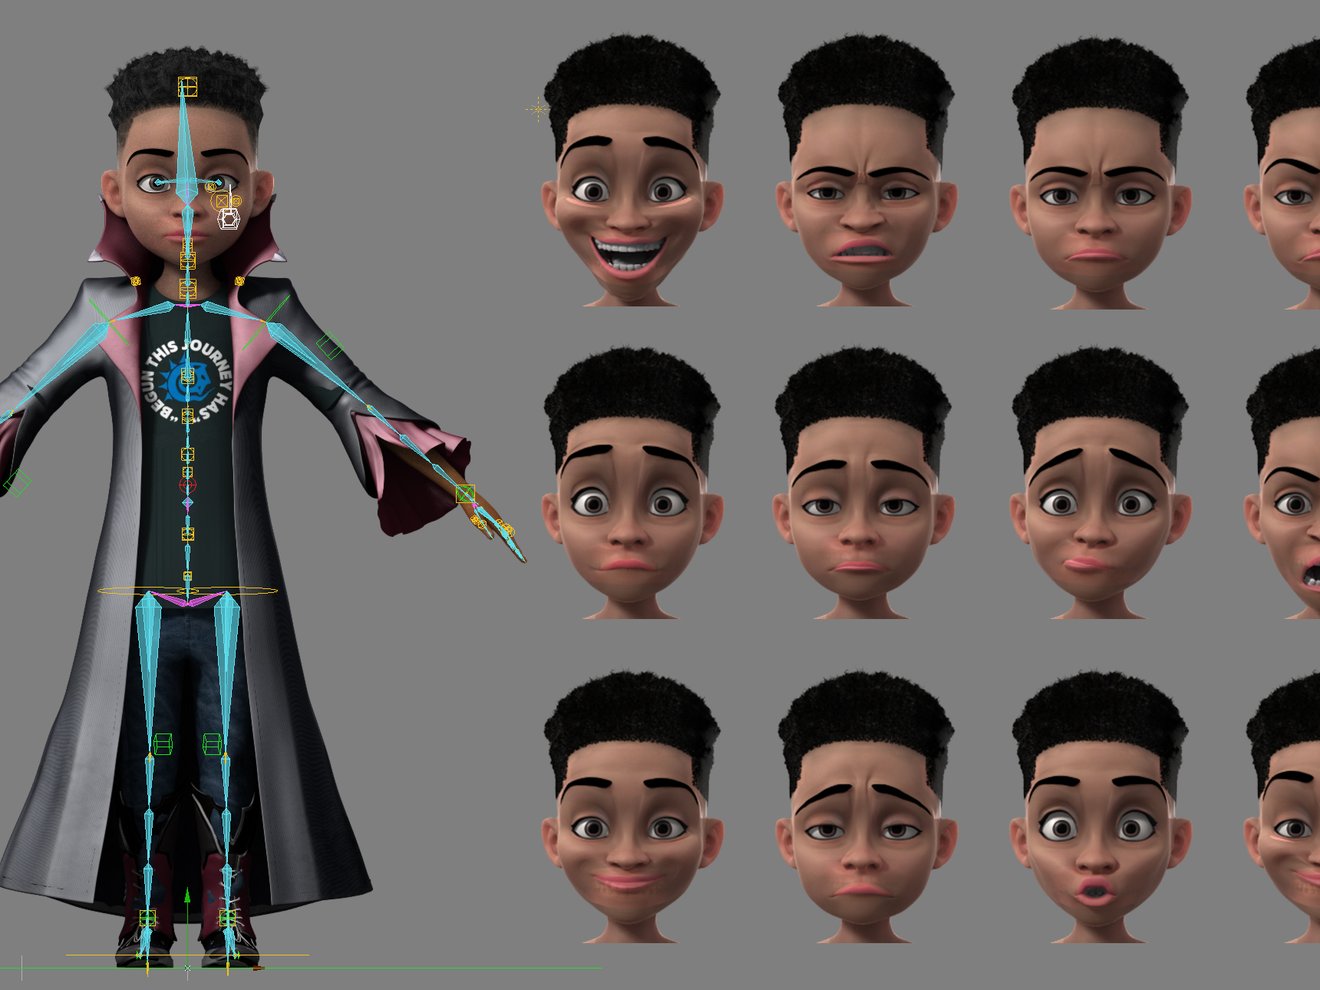
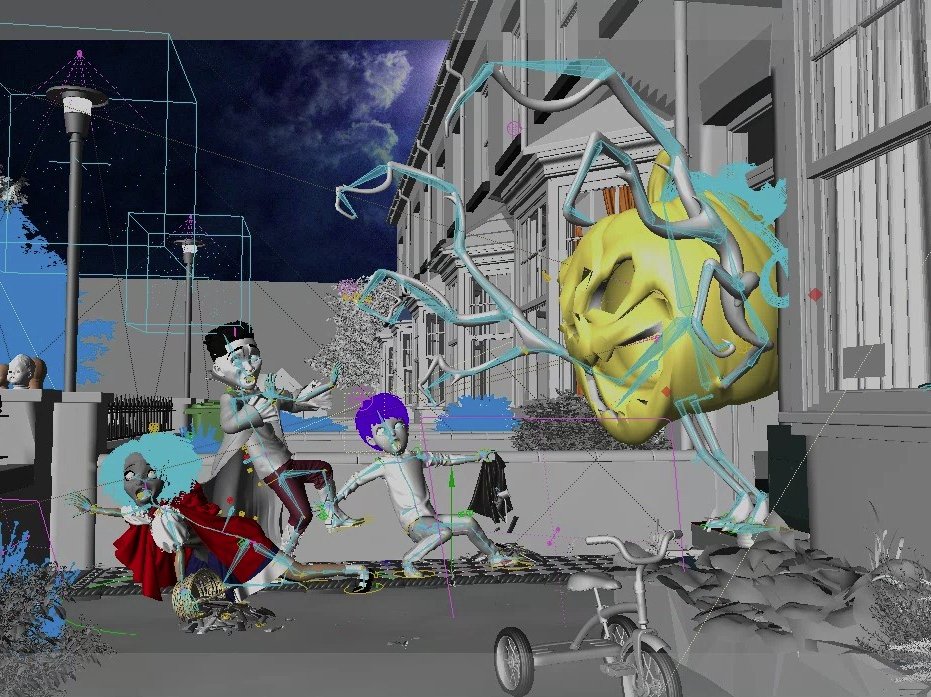
Dan Cox: The trees, shrubs and weeds were part of my library of stock models. The kids (heads only) kind of existed but were heavily modified from what they originally looked like. Genoma was used for rigs (although bespoke rigs were created for the pumpkin and squashes). Everything else in the final image was modelled or textured from scratch.
LD: When did you submit this image?
DC: I submitted this image on the Friday before the deadline, but not quite at the last minute.
LD: How long have you been using LightWave?
DC: I’ve been using Lightwave since about 2002, I think.
LD: Tell me about your inspiration for the pic.
DC: Originally this was going to be animation, so I had it all storyboarded out. All expression morphs had been created and I had created a motion mixer sequence of all the mocap actions. In hindsight, that would have been way too much work for a competition entry but essentially I had to come up with a single composition that conveyed the same story as the entire animation. The location is based on the house I used to live in and I suspect the trick-or-treat costumes (probably including the pumpkin) were all inspired by my kids’ insatiable appetite for dressing up at Halloween. By wanting to do something different I decided to flip the narrative and have the trick-or-treaters being given the fright. As you can see it's the pumpkin and her butternut squash kids that live here and they've also put out human doll heads with candles inside instead of the usual pumpkins.
LD: How did you make the branches for the pumpkin monster?
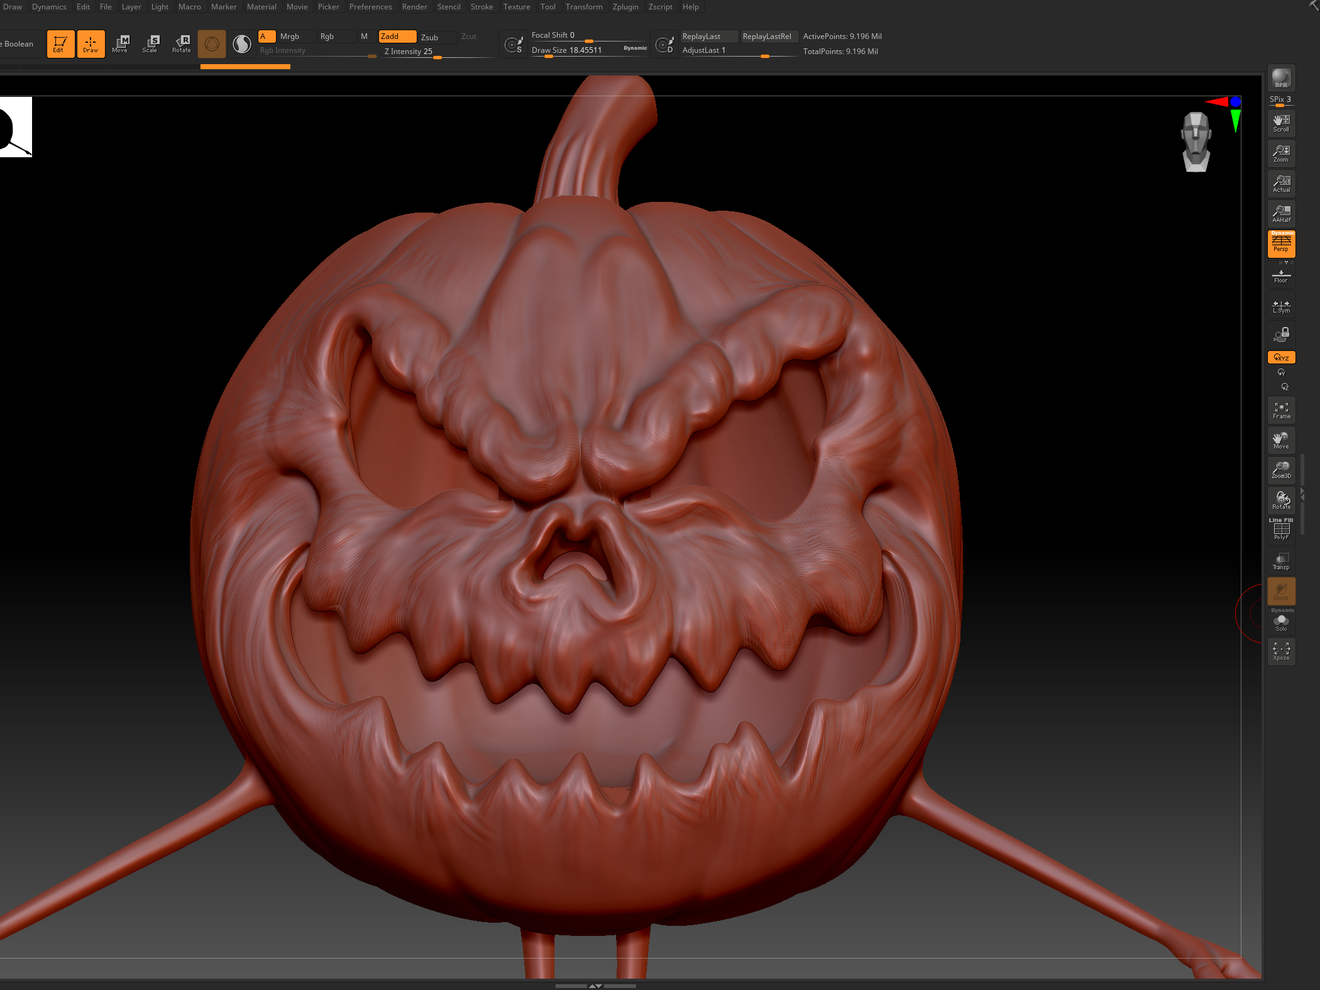
DC: Pumpkin branches were created using the good old magic bevel tool. Perfect for freehand sketching of tapering tendrils.
LD: Who is at the window in the house?
DC: The on-looking characters at the window are the butternut squash kids.
LD: What LightWave techniques did you use? I'm seeing FiberFX, volumetric light (and volumetrics for the clouds?), instancing, rigging, cloth dynamics, surfacing, and modelling - am I missing anything?
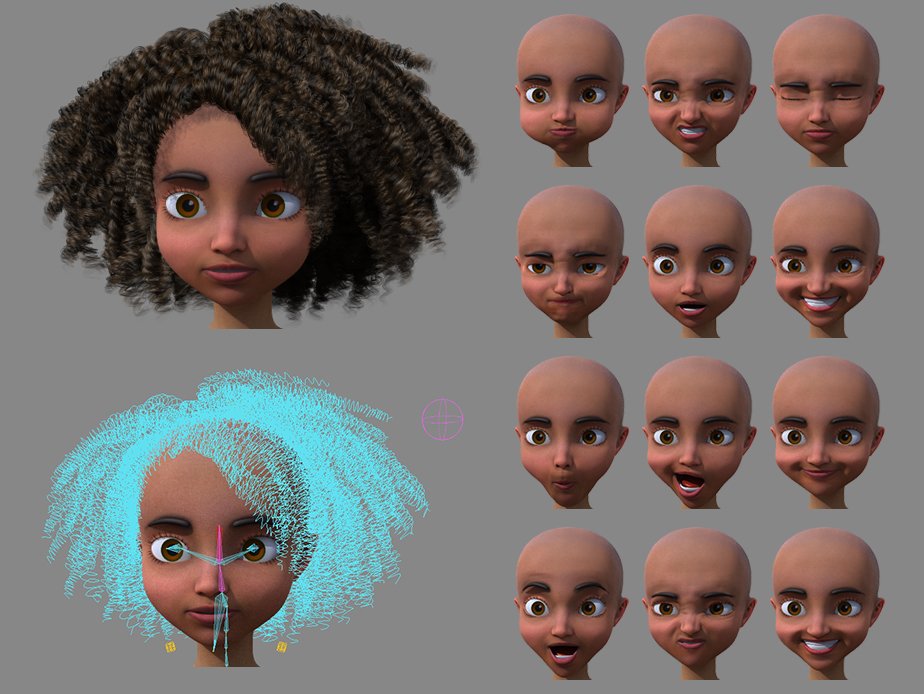
DC: That is indeed FiberFX for all hair and I quite enjoyed the challenge of three very different hair types (straight, ringlets and Afro). Volumetric lights were used for the streetlights, front door light and a light emitting from inside the pumpkin's mouth.
Instancing was used for trees, bushes and weeds. Genoma for the rigging. Subsurface scattering on all skin, doll heads and pumpkin. Zbrush for the face sculpting on the pumpkin. Marvelous Designer for the cloth simulations (including cloth-on-cloth sims). Micro displacement was also used for the gravel and all brickwork. A small bugbear of mine is when I see nice brick textures in renders but the corners give it away as flat geometry. I keep mine all low poly but subdivided many times at render time with a displacement map. This can be seen particularly around the doorway and where the gravel meets the path border. An old technique I used for the moths around the streetlights was the use of Sprite clips attached to a particle emitter. (Keeps polycount down).
I also employed two new techniques for this project that I was trialling. One was to use ZBrush to project all the facial expressions from the (free) ten24 base mesh head onto the heads of my characters which apart from some cleanup around the eyelids worked well.
The second was to create hair splines from the original geo hair by selecting just the edge points of the UV map and converting them to splines for use with FiberFX.
LD: Marvelous Designer looks like a great tool.
DC: Yeah, Marvelous Designer is really great at both making clothes and cloth simulation for my animations. The workflow is pretty straightforward. If it's for a still, then I just export the transformed pose out of Layout and import it into Marvelous Designer as an obj or fbx, create the 2D clothing patterns (I sometimes have to refer to Google for the correct shaped segments, as I don't profess to be a tailor), connect the parts with the sewing tool, roughly arrange them in 3D, then hit spacebar to watch it drape in to place. For animations, I usually import using the Alembic format. You can use an obj plus an mdd file but the Alembic does this in one file, so that's what I normally go with. For fast action, where the cloth might fly off or fall where you don't want it to, I sometimes have to pin parts of the cloth to the character. For the cloak on Little Red Riding Hood, I simulated the dress first, then froze this and simulated the cloak onto that, just because it's easier. For animation, these two would have to be done at the same time.
LD: How long did your image take?
DC: Difficult to say. An hour or two at the end of each day for about 1-2 weeks
LD: Which version of LightWave did you use?
DC: Although I now have Lightwave2023 (but I’m still learning it), this image was created using LW2015 as it's still so fast and grain-free for NPR.
LD: What was the toughest to do as you wanted it?
DC: The toughest part was probably the lighting. There wasn't one lighting setup that would have worked for all characters and objects so each character had their a lighting rig that only affected them. This allowed me to create just the right amount of rim lighting and up-lighting. Each room also had a warm light and a blue light for the moonlight. Making sure each light had a falloff ensured no bleaching out.

