Controller Options
- Set IK Target - This function will allow one controller to drive another controller’s motion. In other words, the currently selected controller drives the previously selected controller. The controller will be labeled with a “T” to indicate that Set IK Target has been applied. Choose Reset IK Target to remove the target setup from the controller.
Steps for setting an IK Target:
- Select the controller that you want to animate.
- Select the controller you want to drive the animation.
- Select Set IK Target. The target is setup and ready to go. Use the Target controller to drive the controller in step a.
- Setting Copy - This function will copy the settings from the previously selected controller. This can be a real time saver when setting up controllers on like items. One example would be setting up the left leg and copying the settings over to the right leg.
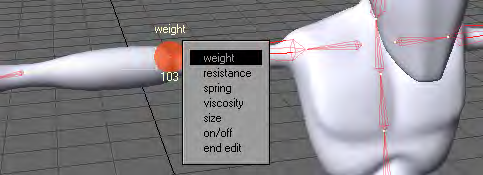
- Dynamics Edit - This function will activate Dynamic Edit mode. Dynamic Edit mode allows you to set the dynamic properties for your controllers.
To change the values for Weight, Resistance, Spring, and Viscosity, simply left click and drag on the control. Dragging left will decrease the value while dragging right will increase the value.
- Weight - Defines the weight of the controller. You can achieve heavy motions by increasing the Weight value, and you can create light motions by decreasing Weight.
- Resistance - Controls the amount of air resistance.
- Spring - Controls the springiness or stiffness of the controller. Reducing the Spring coefficient creates soft motions, while raising Spring coefficient produces motions with a stronger repelling force. Setting the coefficient to an extremely large value creates stiff motions.
- Viscosity - Controls the impact of a collision. A controller with a higher Viscosity value tends to keep its shape more. If a controller bounces, a higher Viscosity value will have less bounce motion because the Viscosity absorbs the bouncing force.
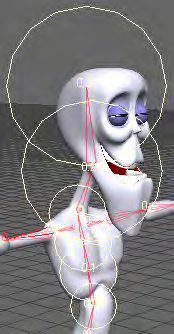
- Size - This setting determines the area of influence the controllers have. The image below shows various sizes on the controllers that make up the head and torso area of this character.
- On/Off - This function will determine whether a controller will be affected by dynamic calculation.
- End Edit - This function will take you out of Dynamic Edit mode.
Controller Edit
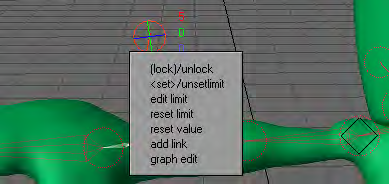
Controller Edit Mode has several options that can be used to customize your Controller settings. Right click to bring up the Controller Options menu.
- Reset - This function will reset the controllers back to its default setup.
- Float /Unfloat - This function toggles the controller between Float and Unfloat.
- Size Mode - This setting determines the size of the controller when it is selected.
- Size 1 - Smallest selected size.
- Size 2 - Medium selected size.
- Size 3 - Largest selected size.
- Not Change - The selected controller size will be based on Controller Size. The selected and unselected controller size will be the same.
- End Edit - This command will exit Controller Edit mode.
Channel Menu
You can independently limit heading, pitch, and bank rotations between maximum and minimum values. You can prevent actions like bending a leg backwards at the knee (unless you’re animating a sports injury). To use the limiting feature, set the Min and Max values on the Edit Limits Panel.
- Stiffness - Controls the springiness or stiffness of the limit. Reducing the Stiffness coefficient creates soft motions, while raising the Stiffness coefficient produces motions with a stronger repelling force. Setting the coefficient to an extremely large value creates stiff motions.
- Copy and Paste - Use these commands to copy and paste settings between channels.
- Reset Limit - This function sets the maximum and minimum settings of the limit to a present value. When Reset Limit is applied, you can edit the Maximun value by holding down the Ctrl key + left click and drag to the value that you want the limit to be set at.
- Reset Value - This function will set the value of the channel to zero (0). This is very handy when you need to quickly set the channels value back to zero.
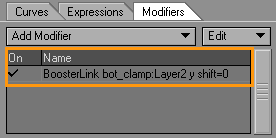
- Add Link - This command will add a Booster Link to the selected channel. The reference controller will be the last controller selected.
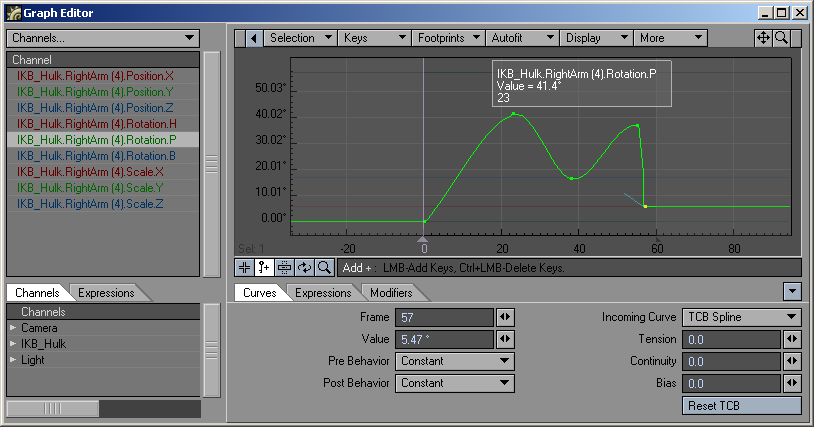
Graph Edit
IK Booster Link
IK Booster Link can be used to link a channel from one controller to a channel in another controller. The Linked controller can be driven by the referenced control. This is very similar to how expressions can be used without writing any expressions.
- Remove - This command will remove the Booster Link Modifier from the channel.
- Change Shift - This function will adjust the motion of the linked controller at different times during the referenced controllers motion. To remove Change Shift from a channel, simply right click on the channel and choose Key Control.
- Change Item - This function will change the reference controller to the last controller selected. This option can be changed in the IK Booster Modifier Panel under the Reference Item drop down menu as well.
- Change ch - This command will allow you to change the channel that drives the selected controller. This option can be changed in the IK Booster Modifier Panel under the Reference Ch drop down menu as well.
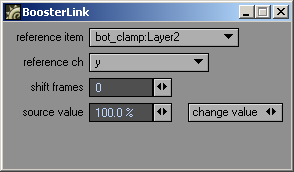
IK Booster Link Modifier Options
- Reference Item - This function will change the reference controller. The reference controller is what drives the linked controller.
- Reference Ch - This command sets the channel of the Reference Item that drives the linked controller.
- Shift Frames - Delays the linked motion by the number of frames specified. Entering “5” moves the frames -5, and -10 moves it +10.
- Source Value - This function sets the percentage between the minimum and maximum value of the referenced channel that will be used.
- Change Value - This function will change the value of the selected channel.
IKB Calculate
(default keyboard shortcut Ctrl X)
The IKB Calculate operation (Modify > IKB Calculate) is used to calculate IK Booster’s Bone Dynamics and generate keyframes based off those calculations. A keyframe will be created on every frame much like motion-capture data.
Move TCB
Another tool in the Modify menu will directly affect your motion path. At the bottom of the Modify list you will find Move TCB. This allows you to set the biases discussed in the Graph Editor section of the manual, but from Layout, rather than having to visit the Graph Editor itself. To use it, move to a keyframe, click on the Move TCB tool and you will notice that the lower left corner now displays T, C, B instead of the more familiar X, Y, Z or H, P, B.
Sliders
(default keyboard shortcut Ctrl D)
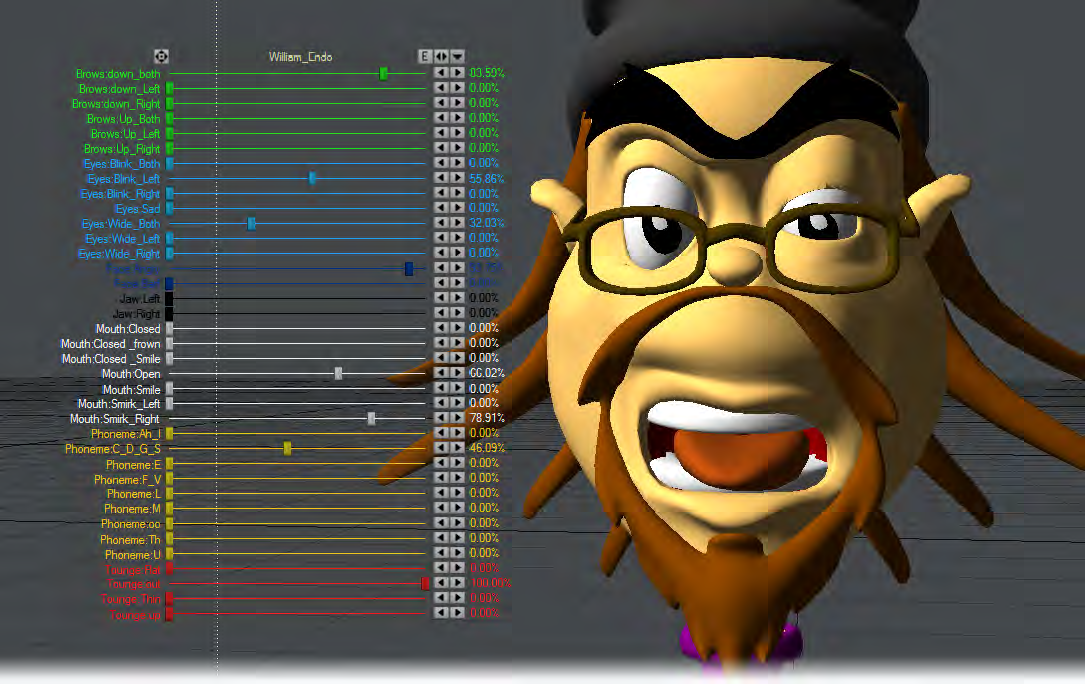
Sliders (Modify > Tools > Sliders) are slider gadgets that are displayed over viewports. An individual slider is tied to a specific animation channel. A slider will indicate the current value of a channel and also let you interactively adjust that channel value. Sliders are useful for all kinds of animations, especially character animations. A good example can be an animated hand, with multiple bone movements for multiple fingers.
To use sliders in a scene:
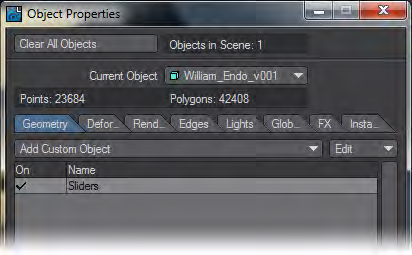
Add the Sliders custom object (Object Properties Panel) to any object.
To display and interact with the sliders, choose Modify > Tools > Sliders. The sliders for the last current object (with the Sliders custom object) will be editable when the Sliders tool is active. Keep this in mind if you have more than one object with the Sliders custom object.
To configure your sliders:
Open the Sliders Custom Object settings dialog from the Object Properties Panel.
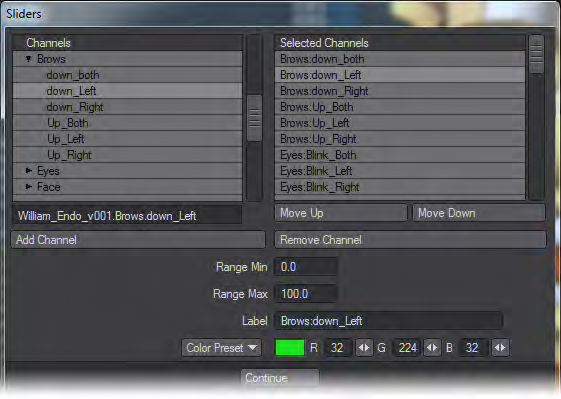
The left window (Channels List) will list all of the channels in the scene. To attach a slider to a channel, simply select the channel in the left window and double click or click the Add Channel button. Selected channels in the right window can be removed with the Remove Channel button.
The Range Min and Range Max settings define the interactive range of the slider. The underlying channel can go beyond these values, but the slider’s range of control and feedback will be limited to this range. If the underlying channel goes outside the range, the slider value will turn red.
Clicking on the slider handle will immediately change the channel to the slider’s corresponding value.
There are three controls along the top. Drag the far-left one to move the slider group. The Envelope (E) button will display the Graph Editor with the associated channels in the curve bin. The right/left arrowhead (<>) button can be dragged to scale the size of the slider group. The arrowhead button on the right will minimise/maximise the slider display.
In the individual slider entries, the handle can be grabbed to slide to any value in the range set up and the arrows at the right end are to jump from keyframe to keyframe.
Spline Displacement
Spline Displacement is not a new tool. It used to be called SplineControl
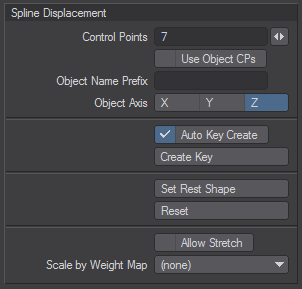
The Spline Displacement Tool (Modify >Tools > Spline Disp Ctrl) is a simple way to animate hoses, tentacles, etc. using a spline with control handles. This tool will create a spline the length of the object with a user specified amount of control points that can be used to deform an object.
To use Spline Displacement
2. In the Object Properties window, Primitive tab, Modifier section, choose Spline Displacement from the Add Modifier Dropdown menu.
3. Choose how many Control Points you want (you can change this later, but doing so might lose any animation set). The slider will set a minimum of 5 and a maximum of 256, but a minimum of 3 can be typed if desired.
4. Use the Spline Displacement button (Modify > Spline Disp Ctrl) to activate and move the nodes around.


