Working with Items
Item Properties
In LightWave there are four item types as shown at the bottom of the Layout interface - Objects, Bones, Lights, Cameras. They each have a dedicated Properties panel. The Bones Properties panel is a little more advanced, but you should familiarize yourself right away with:
- Object Properties
- Light Properties
- Camera Properties
Selecting Items
- Selecting Multiple Items
- Selecting by Name
- Deselecting Items
- Item Selection: Bounding Box
There are several ways to select an item in Layout:
- Click on the item in a viewport;
- Click on the item’s name in the Scene Editor Panel (Scene Editor); or
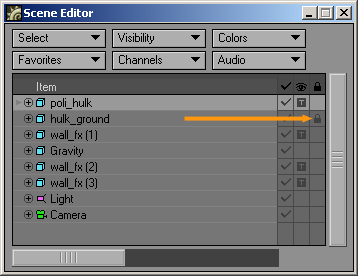
- Manually select the edit mode and then select the item from the Current Item pop-up menu. Note that you cannot select a locked item (a little lock icon appears next to name).
- Use the Item Picker master plugin
You can select items in a viewport by clicking on any polygon edge rather than just on a pivot point.
You can use your Up and Down cursor keys to cycle through the Current Item list. All items, except objects, are highlighted in yellow when selected. When an object is selected, a dotted-yellow bounding box will appear around it. You can select a bone by clicking near its midpoint, rather than its pivot point, making it possible to pick different bones that branch from the same point in a hierarchy.
Selecting Multiple Items
If the toolbar command is a state-type command and the selected items have mixed settings, the button will be shaded diagonally. Clicking the button will toggle the state of the current item and make all other selected items the same. Clicking again will toggle the state of all items.
Selecting by Name
Pressing the apostrophe ( ‘ ) key launches a special selector dialog. Simply type-in a few characters that uniquely identify the desired item and click OK. You can select any type of item.
Deselecting Items
In Layout, one item is always selected. It becomes deselected when you select a different object.
Item Selection: Bounding Box
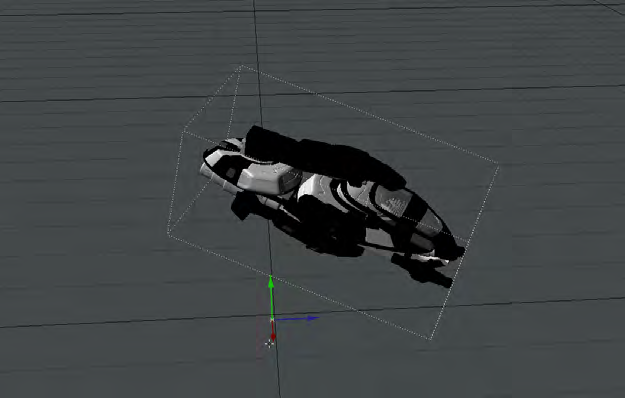
A selection bounding box can be created by dragging your middle mouse button in any viewport.
Items whose points appear within the box will be selected, and if the Shift key is held down, the items will be added to the existing selected items, if they are the same type. If items of more than one type are within the box, preference is given to those items matching the current edit mode.
In addition to the viewports, this also works in other areas of the interface, such as the Graph Editor.
Manipulating Items
Moving
LightWave, like all other 3D packages, has handles to move, rotate and scale your items. Unlike most other 3D packages, you don't have to use them.
To move on the X and Z plane, you can click the left mouse button (LMB) anywhere in the viewport when an object is selected. When you hold down the LMB, the cursor is hidden to aid visibility of your scene.
To move in the Y-axis, use the right mouse button (RMB).
Rotating
Scaling
Scaling can be either axis-independent or uniform. With uniform scaling, there is no handle, just the star of the pivot. As you might imagine, positioning the mouse anywhere in the scene and using the LMB or RMB has the same effect - your object is made bigger or smaller. With axis-independent, you will probably want to continue to use the handles for the accuracy they give. Again, LMB and RMB provide the same effect.
New to 2018
Readout
You can also lock off channels by clicking on the button highlighted in blue next to the channel. Doing so will limit changes to only the channels that are available. Equally, if you wish to be precise about changes, you can enter them numerically here. If you change the rotation order for an item in the Motion Options window, the order you choose shows in this corner readout.
Scene Editor
The Scene Editor (Scene Editor > Scene Editor) is the default choice for its speed of use, but there is also the new Scene / Dope Editor and NewTek suggests that you use the that over the standard. The Classic remains to help the transition for our customers who have a history with the Classic Scene Editor.
New Panel Hierarchies
New panels (like the Surface Editor, Render Properties, Scene Editor, Scene/Dope Editor and others) have collapsible hierarchies. Holding down the Ctrl key when clicking the expander arrow will open or close all children, holding down Shift will affect all siblings and holding down the Alt key when clicking a closed hierarchy will open that group and shut others. Holding Alt when there are several hierarchies open will maintain the one clicked on and close the others. All of the modifiers can be combined, they are not mutually exclusive.
Basic Functions
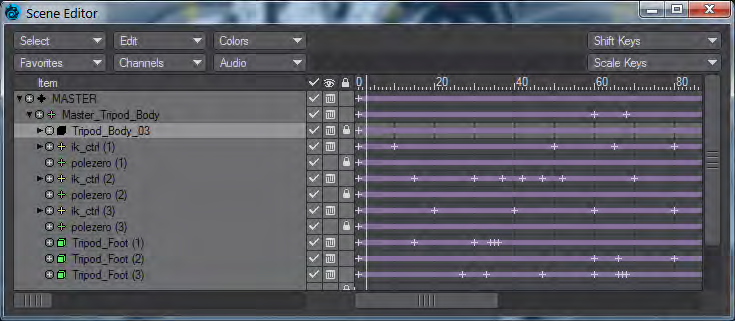
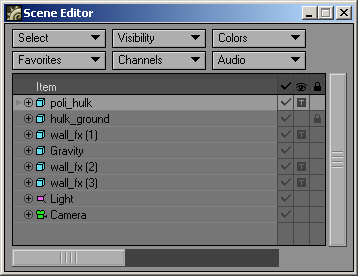
The scene list is a standard LightWave list window. You can expand and collapse groups as well as subordinate items (e.g., child objects) by clicking the arrow icon that appears to the left of the item name.
The +/- sign icon will display or hide the individual channels for the item. Most of the time, these are the position, rotation, and scale channels; however, other enveloped channels can also be included, like light intensity.
The item type icon indicates the type of item and the color used when the item appears in wireframe. You can change this by right-clicking on the item name and selecting a color from the pop-up menu. When working with complex scenes with overlapping objects, it can be beneficial to use different colors for certain items in the scene.
Double-clicking an item’s name will bring up the related Properties Panel.
If you drag the right edge of the panel, you can shrink the size of the Scene Editor and hide the keys display. Use in this mode as a scene item picker!
The checkmark column activates or deactivates items. Deactivating an object is like setting its Object Dissolve (Object Properties) to 100%, and deactivating a light is like setting its Light Intensity (Light Properties) to 0%. For a bone, this toggles its Bone Active state (Bone Properties). This option has no effect on cameras.
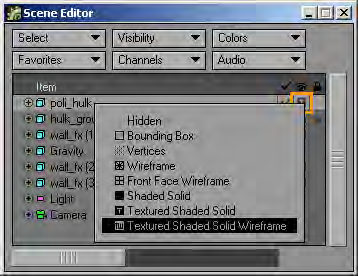
The “eye” column is the visibility column. For objects, clicking on this icon will display a pop-up menu where you can select how the object is displayed. This can range from making the object hidden all the way up to showing it as a textured shaded solid.
The Visibility setting can dramatically affect not only how an object is displayed, but also how fast the display is updated. Moving a 200,000-polygon 100-surface spacecraft around the screen using a textured display surely requires greater computing power than a wireframe six-sided bounding box. There are other reasons as well. Often, in a very complex scene, you may need to play with object visibility options in order to concentrate on certain aspects of the scene.
Most of the Visibility settings are self-explanatory. Front Face Wireframe will show only polygons that face the camera. The Textured Shaded Solid adds image-mapped surface textures.
Pop-up Menu
Keyframes
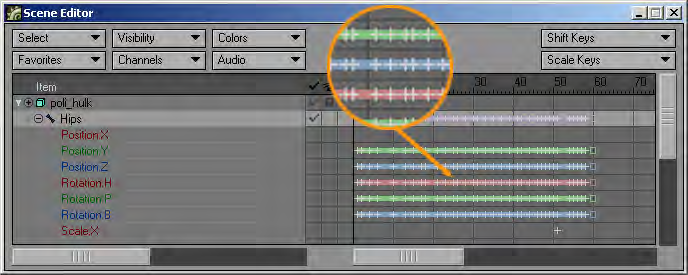
The colored bars to the right indicate the length of the keyframed channel. The bar starts at its first keyframe and ends at the last one. (Note that the ends may be past the end of the visible display area.) The plus signs indicate keyframes.
The line with the item’s name is the master channel and will show a composite of all of the keyframes in any of the underlying channels.
Adjusting Channels
You can move individual keyframes by dragging them with your mouse. The affected key is highlighted when you initially click on it. Dragging on the bar, off any key, will move the entire bar forward or backward in time.

